This feature is only available on our Enterprise plan. Contact sales for more information.
Before you begin, make sure you have an Admin account (Viewer or Contributor) with Abstract.
Step 1: Configure SAML 2.0 for Abstract in ADFS
Abstract supports SAML 2.0 protocol. You may need to add the following information in ADFS:
|
Resource |
Value |
|
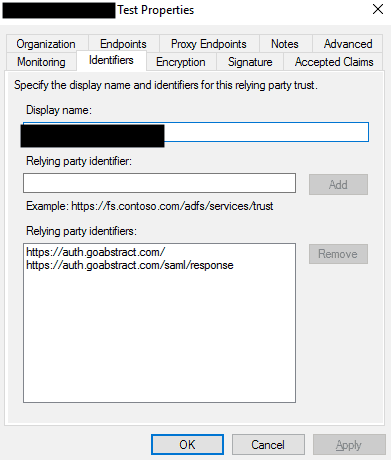
Abstract's EntityId |
|
|
Abstract's Assertion Consumer Service (ACS) URL |
|
|
Audience Restriction |
About SAML responses:
- We currently only support HTTP:POST binding.
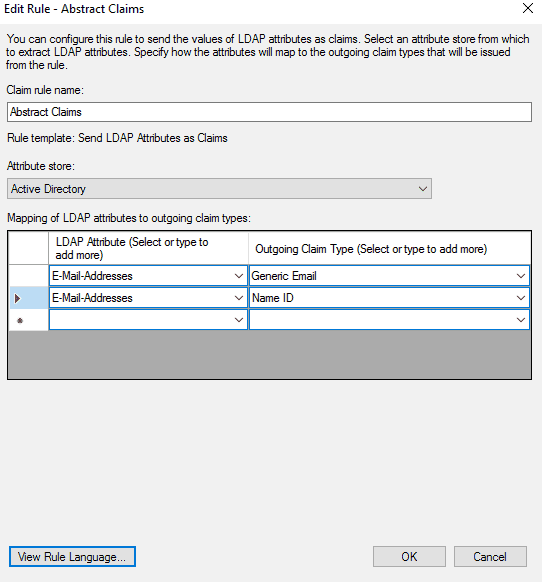
- We are expecting an "email" Assertion Attribute, as shown below.
<saml2:Attribute Name="email" NameFormat="urn:oasis:names:tc:SAML:2.0:attrname-format:unspecified">
<saml2:AttributeValue xmlns:xs="http://www.w3.org/2001/XMLSchema" xmlns:xsi="http://www.w3.org/2001/XMLSchema-instance" xsi:type="xs:string">email@example.org</saml2:AttributeValue>
</saml2:Attribute>
Set an attribute with Name to “email” and the value to the user’s email address (shown in screenshots below).
|
|
|
Additionally, make sure the "XML declaration" tag is present at the very beginning of the XML metadata:
<?xml version="1.0" encoding="UTF-8"?>
If there is no Name ID element in SAMLResponse, you receive an error.
Step 2: Set up SAML single sign-on in Abstract.
- Open the Abstract app (desktop or web).
- In the left side pane, click on the organization name.
- Select the Permissions tab.
- In the Configure SSO section, enter your Metadata URL and Entity ID.
- Enter any manual exceptions you might have. Emails listed in the manual exceptions section bypass SSO and can log in with email and password.
- Click Test with my Account. If the test fails, contact our support team to manually enable SSO.
- Toggle Activate SSO on.
- Click Save Changes.